

it started like this...
a catalog arrived in the mail with a quilt on the cover...
this inspired me to think of a way to make a "quilt" (paper, of course!) with tim's distress paints...
plan A was REALLY ugly & is residing in the landfill now...
I can't even show a photo...it would hurt your eyes!
I'm serious!
plan B was so-so...but not inspiring...
plan C worked & I had a blast...
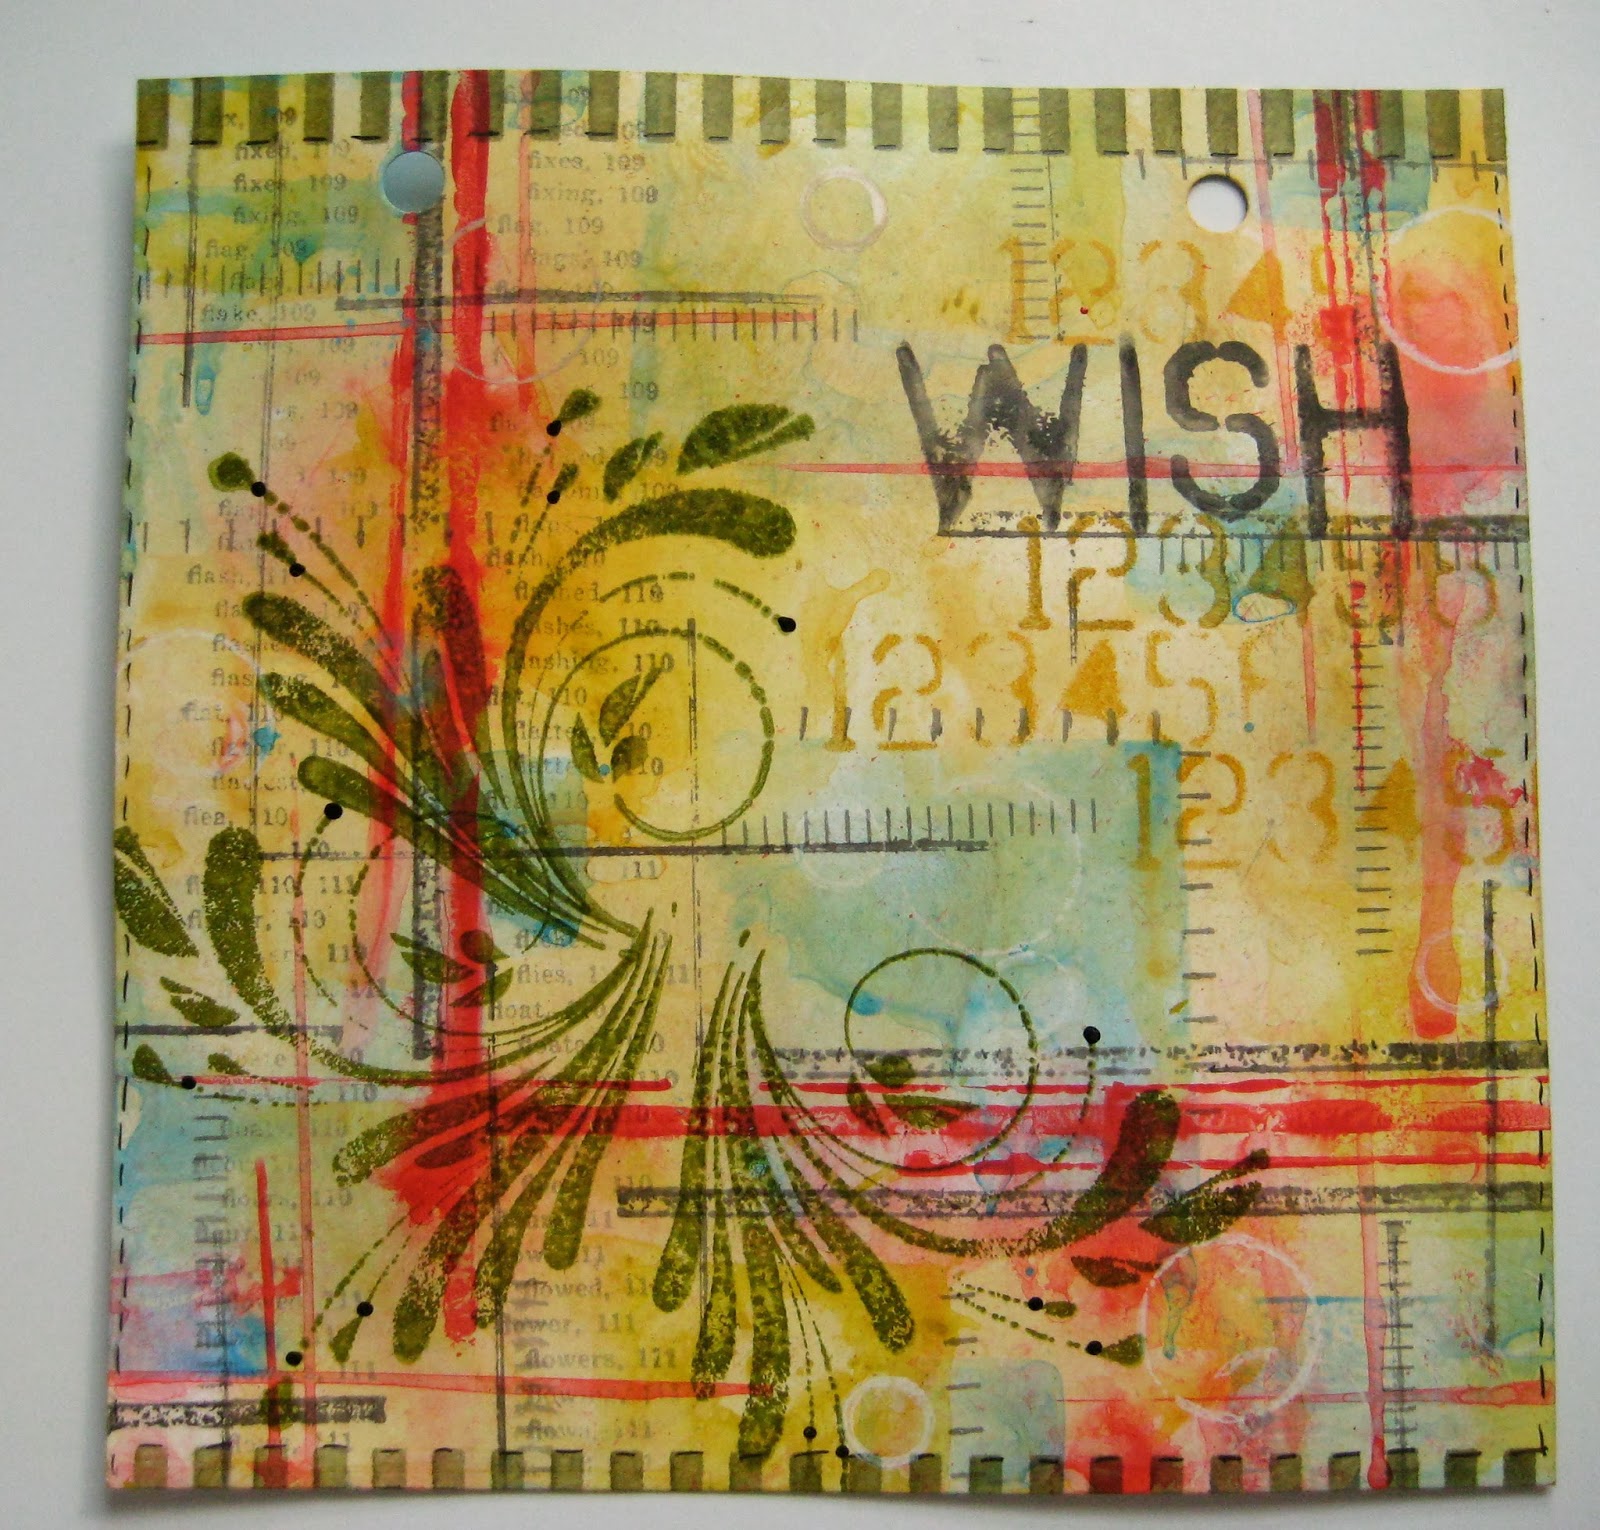
the base is a 5 1/2 inch square specialty stamping paper page in my square art parts art journal...
I also did this technique on the new distress watercolor cardstock...it's fantastic!
anyway...here's the result...

I'll walk you thru what I did...
if you want to play along, I used these distress paint colors...
REMEMBER...this is important...
***you MUST DRY between layers***
this technique works because distress paints are waterproof when dry...
this makes layering colors foolproof...
I applied distress paint to an acrylic block...
I used a 2 inch square one & dabbed the paint on, then misted it with water...I used 2 squirts from the mister...that seemed to be the right amount...but try it yourself, to see what you like...
I pressed the acrylic block onto the paper in 3 places to start...
dry between layers...
and keep adding more paint "squares" with different paint colors...
I used the acrylic block, because I wanted some corners/straight lines, to create the quilt like effect...
overlap the layers...and use just portions of the acrylic block...
use different sizes of blocks too...
so far...not too cute...
it goes thru the uglies before it gets better...
just keep going...

next I added my accent color, barn door...
I applied the paint to the edge of a grid block & used that as a stamp...
while the paint was wet, I misted it with water, then dried it...
***MAKE SURE TO CLEAN THE PAINT OFF THE GRID BLOCK***...
next I added some lines with my watering can archival ink...
I used an old credit card for the skinny lines & a grid block edge for the thicker lines...
looking much better...

to tone down the white, I inked over the whole page with scattered straw on the blending tool...
the large flourishes are stamped in fern green archival & wish is stamped with watering can archival...
the dots/stripes stencil makes the borders...I used fern green...
to make the embellishments...
I stenciled red geranium archival & orange blossom thru the layered flower stencil, onto manila cardstock & cut it out...
I die cut a tattered florals flower from clearly for art, that had been covered with vintage text...then stamped over it using my reverse dots background stamp (my new favorite) with red geranium. once that was dry, I toned down the white with wild honey on the blending tool...
the little bird is a mini movers/shapers...it's CFA covered with vintage dictionary page, but this time I added just a bit of black soot distress paint to the CFA side & allowed some of the text to show thru...it's a cool effect...especially for Halloween...
the smallest flower is also a tattered florals die cut, painted black...
and it has a black rhinestone center...

here's a better look at the layered flower stencil...
to create the flower, just ink thru one flower...either is fine to start with...

then lay the other stencil over the inked area & this will cover up the stenciling from the first color...
then stencil a second color ...
or...use one of the embossing pastes for one flat & one raised layer!
simple & FUN!

and again...
plan C...

oops...somewhere along the way you'll see that I stenciled some numbers around wish...I used wild honey paint with the blending tool...
another oops...I also lightly stamped the index stamp along the left hand side, with watering can archival...that stamp is in an older set LCS038...live & make art...
it's subtle...but it adds another layer of interest...
yikes forgot this too! the little circles are some lids that I pressed onto the snowcap pigment ink pad...
and don't forget to add some doodle lines...

so...the moral of this post?
if plan A is UGLY...
and plan B isn't much better...
PLAY PLAY PLAY...
plan C just might work!
really...it's all about having FUN & trying new things...
when YOU
make art!
wendy
26 comments:
Thank you Wendy!! I love it!
I love this! I may just have to borrow some of the design to create some journal pages for a swap. So very cool!
Wow, you know how to play! I give it a try next time ;-)
This is great, thank you for sharing the "how to" with us!!
I love it (your background) it's marvelous darlin!!! The whole card turned out beautifully! I'm gonna play around with this idea of yours!:)
This is really gorgeous!!! I'm glad you kept going!!! Thanks for the tutorial!!!
I actually have some free time this week...now to see what I can create using your quilted piece as inspiration.
oh Wendy, this is beautiful!
Sandra ltb
I bet version A and B weren't that bad really... great tutorial and love the finished piece!
Wow! That is so gorgeous, I love all the different layers. Thank you for the great tutorial.
I love this! Thanks so much for sharing your Plan C.
You are so right! Plan C is absolutely brilliant, love the colours and thanks for all the tips too. Always lovely to see your 'how to's'.
What a fantastic square! I love your color combo, the striped flowers, I have a crush on! Simply beautiful!
Love your Plan C creation...hugs kath xxx
Love your Plan C creation...hugs kath xxx
Plan C is perfect Wendy. Thank goodness for that catalogue! Mind you, it takes someone brilliant like you to translate it into a work of art like this. Jenny x
This is wonderful! I love the entire thing and the process is very doable!
Oh my gosh, stunning!! Plan C - fabulous!! I absolutely LOVE this!! You are amazing!! Have a great evening :)
Lisa
A Mermaid's Crafts
Wendy, love the project. You are right you have to work through the ugly! My projects start out that way too!
Wow, fabulous! You've given me an idea for something to make for a friend.
Gorgeous project Wendy and all from looking at a qult cover ! Sue Cx
FAAAAAABULOUS!!! Totall inspiring, Wendy! Love the colors! (Wondering... is that flourish stamp available as a single, or only in the set?)
FAAAAAABULOUS!!! Totall inspiring, Wendy! Love the colors! (Wondering... is that flourish stamp available as a single, or only in the set?)
Just beautiful
Way cool! Love the effect..the plaid is really awesome! Love the color of the flowers too!
OMG Wendy this is gorgeous! Gotta give it a try. Thank you for sharing.
Post a Comment